
Our
aircraft tie down anchors provide permanent or temporary ground fixings
to secure light aircraft in open ground. They are easy to install in
any weather and can be quickly removed without damaging the ground.
They are not suitable for carrying in an aircraft as they are far too heavy.
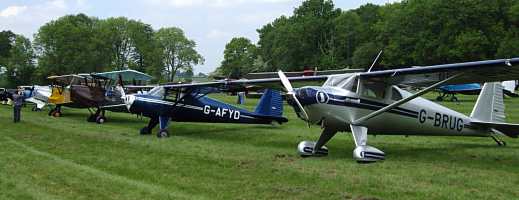
Owners of small aircraft and gliders know that if the aircraft is to be kept outside, it must be anchored to the ground, as strong wind can easily flip it over. Tailwheel aircraft are especially vulnerable - with no one on board, the reduced weight means with headwinds as low as 30 - 40 mph, the aircraft can start 'flying' on its own.
The anchors are very useful for operators of small airfields, as heavy duty tie downs can be provided for air rallies and shows (and general emergencies), without needing concrete, also they can be removed without disturance to the ground.
Our anchors offer exceptional loadings, however, they must be prevented from rotating and unscrewing themselves, in many sitiuations, rotation is prevented by a bracket, where there is no bracket, always hammer the anchor in at an angle of between 30 and 45 degrees to the direction of pull, otherwise they will rotate out.
Methods of providing a lashing point, (in order of cost).
1/ The simplest method is to make a shallow depression in the grass, normally with a couple of sledge hammer blows in the grass, hammer a standard Erdanker anchor in at an angle to the expected direction of pull, hammer to below ground level, fit a shackle. The shackle will lie flat when not in use.
2/ As above but use a chaining anchor, these have a 16mm hole instead of the standard 10.25mm hole, the larger hole allows for a larger shackle to be used.
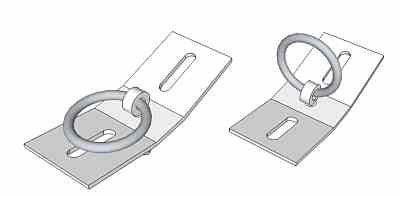
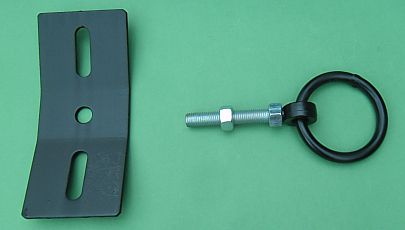
3/ Use a ring type anchor, hammer in at an angle to just below ground level, no shackle is needed.
4/ Use 2 ring type anchors. This has 2 advantages, firstly, the obvious one of double the load capacity, secondly, when the rings are bound together, neither anchor can rotate.
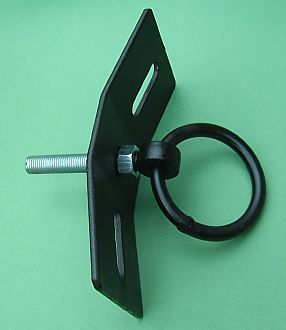
5/ Use the W series bracket with 2 low head safety anchors. To start, make a shallow depression in the grass with a few hammer blows directly in the ground, hammer 1 anchor in, through a slot in the bracket, then hammer in the other anchor.
Important: we do not guarantee our anchors will hold in all situations. The person putting the anchors in must use his or her own judgement. Problems can occur with very soft ground, sand, recently dug ground, mud etc.

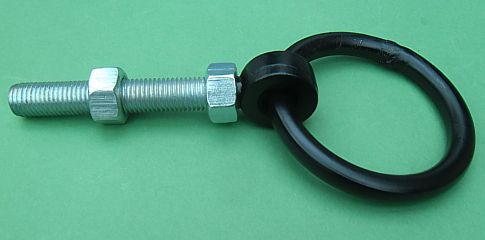
These heavy duty anchor points require 2 of our low profile anchors. There are 3 suitable anchor lengths available: 50x660LP, 50x770LP and 50x870LP, the anchors can be found on the Equestrian anchor page. The W505 bracket can be found on the JF fittings page.
They offer a number of features which are particularly useful to aircraft and glider operators, including:
1/ Very small tripping hazard,
2/ Significant pullout values, often well in excess of aircraft spar strengths.
3/ When recessed slightly into the grass, the ring will lie flat with the grass, making tyre damage unlikely.
4/ In most cases, they can be mowed over.
5/ They can be quickly installed in any weather and only need a sledge hammer to install.
6/ They are considered permanent anchor points, however, if they need to be removed, no special tools are needed, just a large adjustable spanner to unwind the anchors (about 5 minutes per bracket). Particularly handy if you have temporary parking.
7/ If removed, there is almost no noticeable damage to the ground.
8/ They can be removed and re-used any number of times, if needed.
9/ Cheaper than hangerage, which probably isn't available anyway if you fly anywhere near the South of England!, plus you don't spend hours of back breaking work, moving everyone elses plane out of the hanger just to get your own out for a 30 minute flight!
Installng.
The bracket needs to be recessed into the ground slightly, such that the highest part is about flush wth the ground level. Either dig a tiny recess the right shape, or simply make a recess by sledge hammerng the ground to the right shape. Screw a nut on the eyebolt as far as it will go and tighten the other nut below the plate, there will be about 100mm of eyebolt below the plate. Force the plate into the recess in the ground, if neccessary, tap the eye of the eyebolt (with a piece of timber to avoid damage) so the assembly is retained in the ground at about the right height, then hammer one anchor in through a slot, then the other. You might need to hold the plate down by foot to steady it when starting the first anchor. With both anchors in, the job's done!
Caution! Be aware of what is or might be below the ground, eg cables, pipes etc. obviously less likely at the side of a farmers field, but may be present if you're anchoring right outside a busy hanger. Also, use common sense and good judgement as to whether your particular ground conditions are suitable, some soils may be too soft or too sandy for the anchors.
They are not suitable for carrying in an aircraft as they are far too heavy.
Owners of small aircraft and gliders know that if the aircraft is to be kept outside, it must be anchored to the ground, as strong wind can easily flip it over. Tailwheel aircraft are especially vulnerable - with no one on board, the reduced weight means with headwinds as low as 30 - 40 mph, the aircraft can start 'flying' on its own.
The anchors are very useful for operators of small airfields, as heavy duty tie downs can be provided for air rallies and shows (and general emergencies), without needing concrete, also they can be removed without disturance to the ground.
Our anchors offer exceptional loadings, however, they must be prevented from rotating and unscrewing themselves, in many sitiuations, rotation is prevented by a bracket, where there is no bracket, always hammer the anchor in at an angle of between 30 and 45 degrees to the direction of pull, otherwise they will rotate out.
Methods of providing a lashing point, (in order of cost).
1/ The simplest method is to make a shallow depression in the grass, normally with a couple of sledge hammer blows in the grass, hammer a standard Erdanker anchor in at an angle to the expected direction of pull, hammer to below ground level, fit a shackle. The shackle will lie flat when not in use.
2/ As above but use a chaining anchor, these have a 16mm hole instead of the standard 10.25mm hole, the larger hole allows for a larger shackle to be used.
3/ Use a ring type anchor, hammer in at an angle to just below ground level, no shackle is needed.
4/ Use 2 ring type anchors. This has 2 advantages, firstly, the obvious one of double the load capacity, secondly, when the rings are bound together, neither anchor can rotate.
5/ Use the W series bracket with 2 low head safety anchors. To start, make a shallow depression in the grass with a few hammer blows directly in the ground, hammer 1 anchor in, through a slot in the bracket, then hammer in the other anchor.
Important: we do not guarantee our anchors will hold in all situations. The person putting the anchors in must use his or her own judgement. Problems can occur with very soft ground, sand, recently dug ground, mud etc.
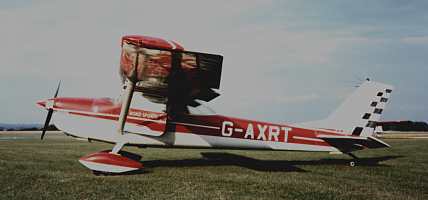
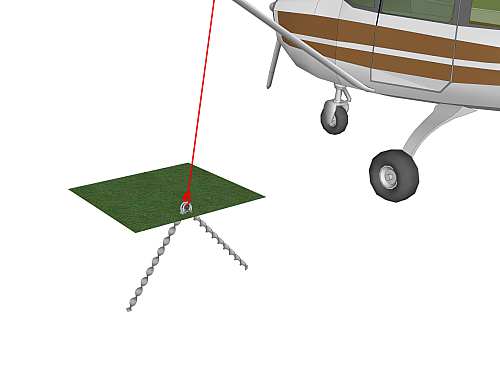
A C172 anchored with a single AT type anchor
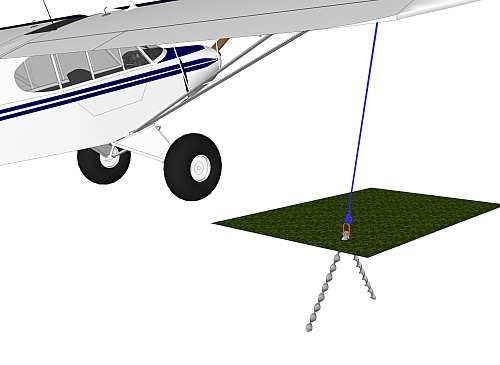
C172 anchored with 2 ring type anchors
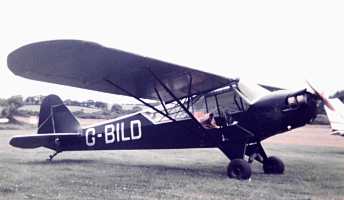
Cub anchored with 2 anchors
W505 bracket, suitable for using 2 Low Profile anchors
These heavy duty anchor points require 2 of our low profile anchors. There are 3 suitable anchor lengths available: 50x660LP, 50x770LP and 50x870LP, the anchors can be found on the Equestrian anchor page. The W505 bracket can be found on the JF fittings page.
They offer a number of features which are particularly useful to aircraft and glider operators, including:
1/ Very small tripping hazard,
2/ Significant pullout values, often well in excess of aircraft spar strengths.
3/ When recessed slightly into the grass, the ring will lie flat with the grass, making tyre damage unlikely.
4/ In most cases, they can be mowed over.
5/ They can be quickly installed in any weather and only need a sledge hammer to install.
6/ They are considered permanent anchor points, however, if they need to be removed, no special tools are needed, just a large adjustable spanner to unwind the anchors (about 5 minutes per bracket). Particularly handy if you have temporary parking.
7/ If removed, there is almost no noticeable damage to the ground.
8/ They can be removed and re-used any number of times, if needed.
9/ Cheaper than hangerage, which probably isn't available anyway if you fly anywhere near the South of England!, plus you don't spend hours of back breaking work, moving everyone elses plane out of the hanger just to get your own out for a 30 minute flight!
Installng.
The bracket needs to be recessed into the ground slightly, such that the highest part is about flush wth the ground level. Either dig a tiny recess the right shape, or simply make a recess by sledge hammerng the ground to the right shape. Screw a nut on the eyebolt as far as it will go and tighten the other nut below the plate, there will be about 100mm of eyebolt below the plate. Force the plate into the recess in the ground, if neccessary, tap the eye of the eyebolt (with a piece of timber to avoid damage) so the assembly is retained in the ground at about the right height, then hammer one anchor in through a slot, then the other. You might need to hold the plate down by foot to steady it when starting the first anchor. With both anchors in, the job's done!
Caution! Be aware of what is or might be below the ground, eg cables, pipes etc. obviously less likely at the side of a farmers field, but may be present if you're anchoring right outside a busy hanger. Also, use common sense and good judgement as to whether your particular ground conditions are suitable, some soils may be too soft or too sandy for the anchors.
